How to design XR Procedures
The XR Platform and MR Editor are both necessary to create rich XR Procedures. Switching between them is a must!
- XR Platform: add as many videos, pictures, text and details as is necessary for the training
- MR Editor: create spatial markers like arrows, highlights, etc. around your physical object that guide trainees during the training
Using the XR Platform
Note
Make sure you have the Designer or Administrator role. You can change roles by clicking on them and switch to another one in the list.
This is the hierarchy of projects, procedures and steps:
Project
-
Procedure A
-
Step 1
-
Step 2
-
Step 3
-
-
Procedure B
- Step 1
All the procedures you create are managed in projects. A project can hold multiple procedures. Procedures hold multiple steps to complete it.
Create a project on the XR Platform
Tutorial video before 4.0
-
Go to the XR Platform.
-
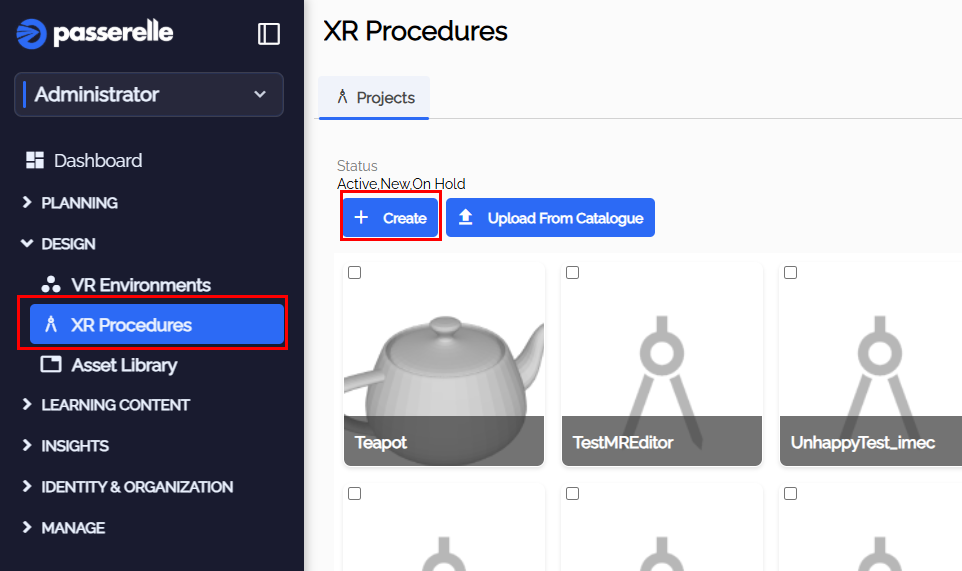
Open XR Procedures and press 'Create'.

-
When pressing create, you need to fill in the empty fields
-
Choose a clear title.
-
Give a description of the project.

-
Add Members to the project. They will have access to all procedures within. Don't forget to give them the right role:
-
Designer
-
Validator
-
Planner
-
-
You can add a VR environment. This environment will be used when using procedures in VR.
-
Press 'Create' in the upper right corner to create the project.
Create an XR Procedure on the XR Platform
- Go to the XR Platform.
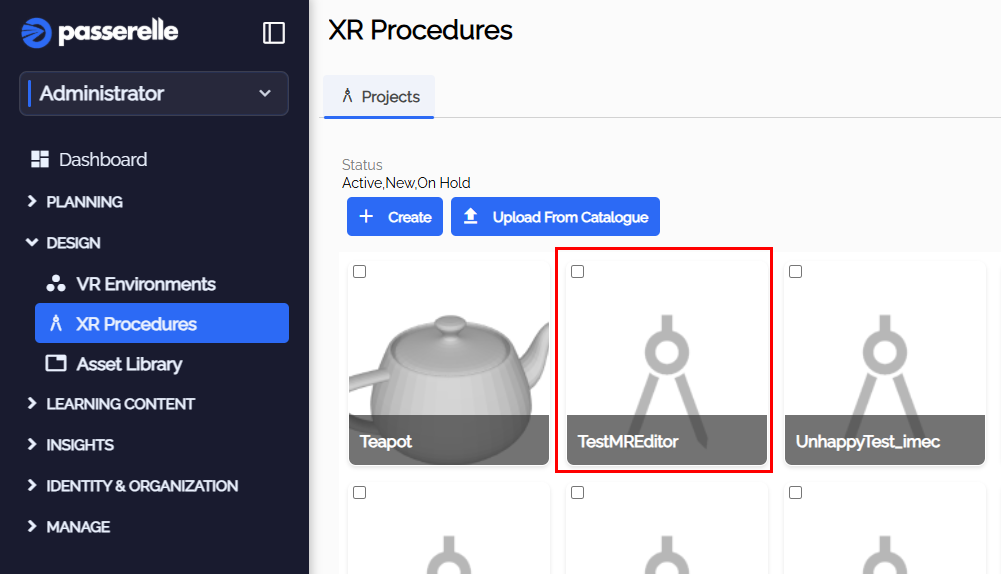
- Go to XR Procedures and choose a project where you want to add a procedure.

- Press create and choose a title and description for the procedure.
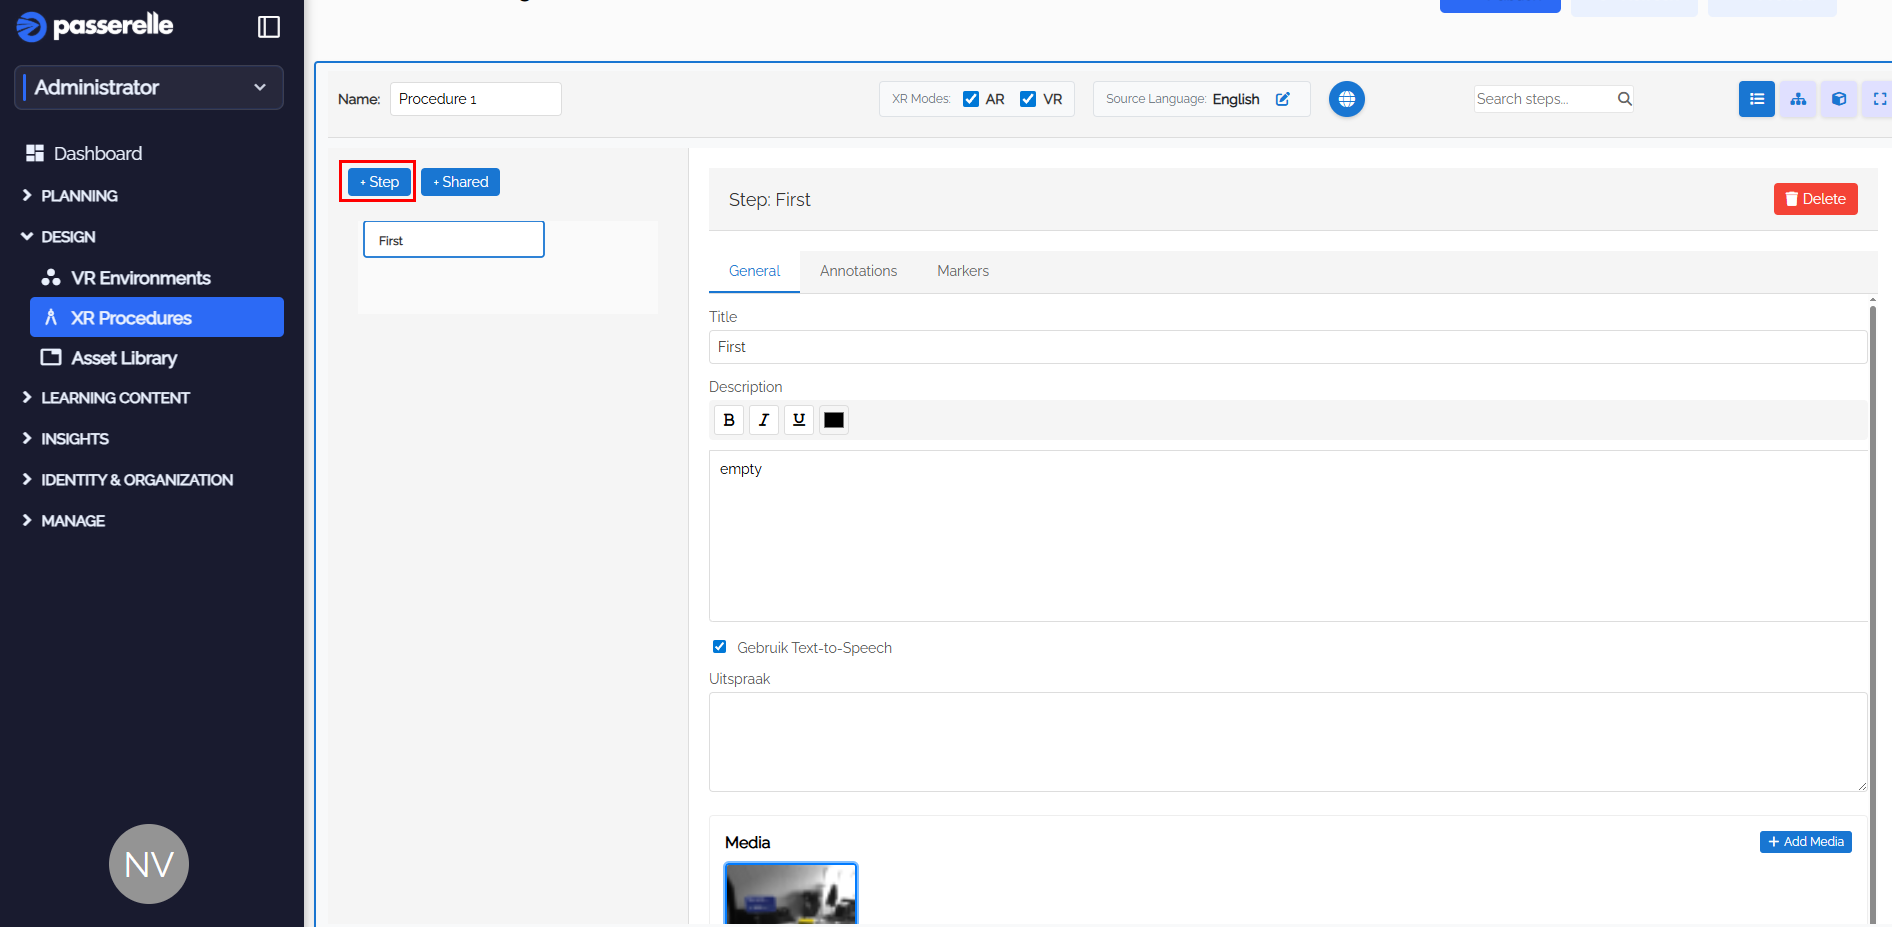
- Start creating steps. Choose a title of the new step and a description. This could be an instruction. If you add text to 'Uitspraak', you will hear this spoken instruction instead of the description

- You can also add Media files to your steps.
Add translations to your XR Procedure
- It's possible to automatically or manually translate your procedure for people who need to train in different languages.

- There will always be a default language. But when pressing the Translate button, you can add other translations.

-
When choosing a language, all steps will be translated for you, but you can manually override it.
-
Make sure to select this language in the personal profile. The language in procedures will be changed to the one added in the XR Procedure

Using the Passerelle MR editor
Note
Make sure you have the Designer role.
Open MR editor on your device
Meta
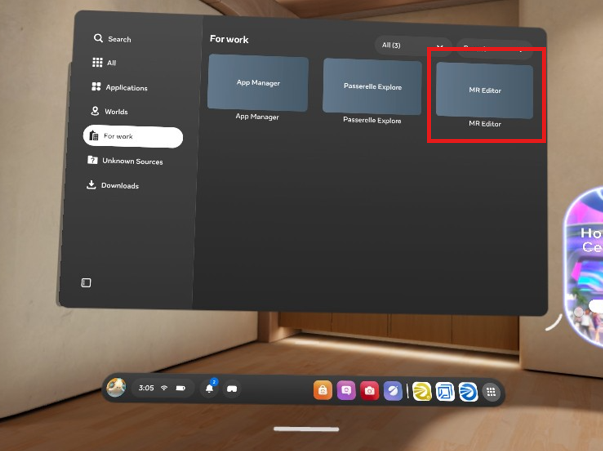
UI can change depending on which meta headset you are using. Go to the library and 'unknown sources' or search in Work related applications to find the MR Editor
Pico
Go to app library and select MR Editor
Log into the MR editor
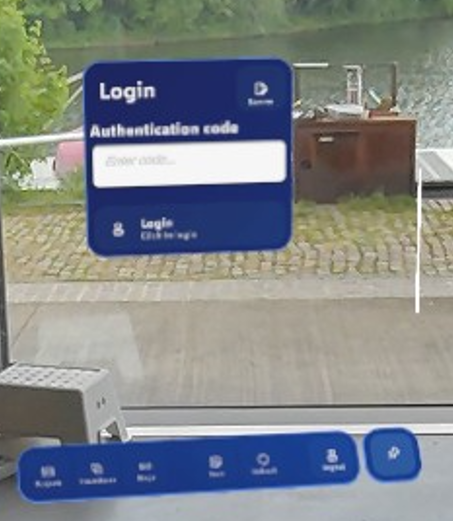
To log in to the Passerelle Editor you need your Authentication code. You can find this on the XR Platform.

- Select your profile and press QR Authentication.

- Your temporary authentication code will appear. Scroll a little if you don't see it immediately.

- Press Log In when you entered the code.
Create a project with the MR editor
Hierarchy of projects, procedures and steps:
Project
-
Procedure A
-
Step 1
-
Step 2
-
Step 3
-
-
Procedure B
- Step 1
-
Create a project by pressing New project.
-
Change the position of the screen by using the handles next to it.
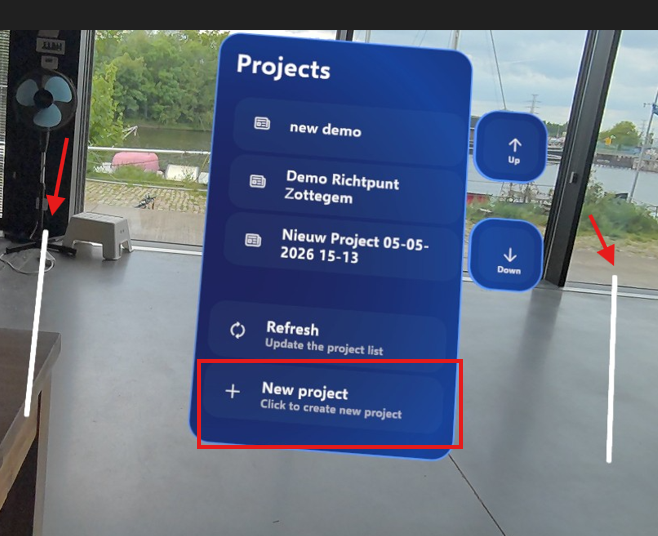
- Choose a clear and unique name for your project. It is important to be able to distinguish between them.
Create a procedure
-
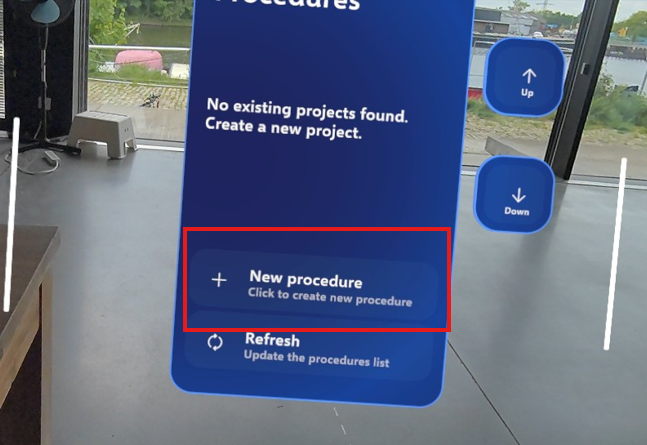
You can have multiple procedures within a project.
-
Create a new one by pressing New procedure. Give this procedure a specific name.
Create steps
-
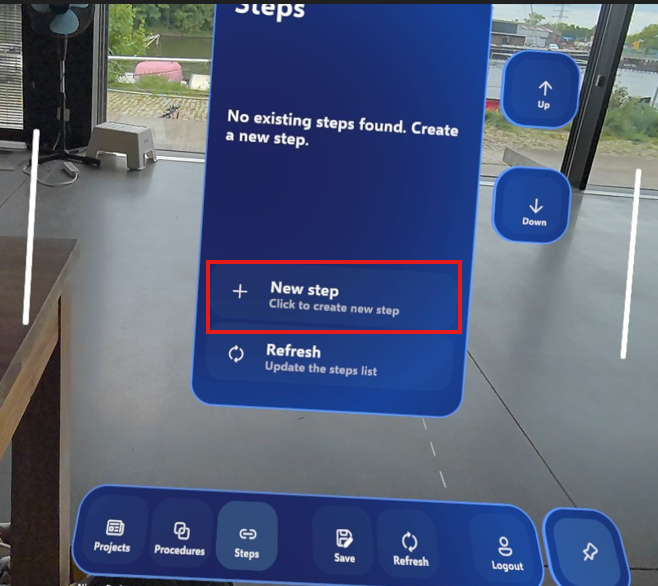
Press 'New step'
-
Give the new step a name and description.
Add pictures to the step.
- Press the camera icon to make a picture. Make sure to keep your head still until you hear a camera sound. This might take a short while.

Add markers to the step
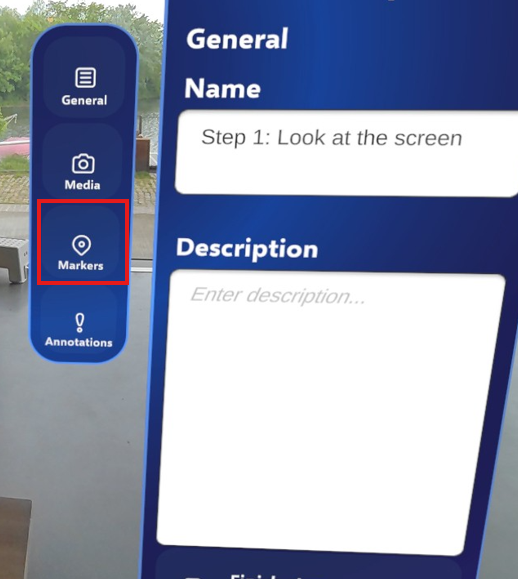
- When using markers, you first need to create a (spatial) anchor. The anchor is necessary to position your markers in the physical space correctly. You can place markers within a radius of 3m of the anchor.
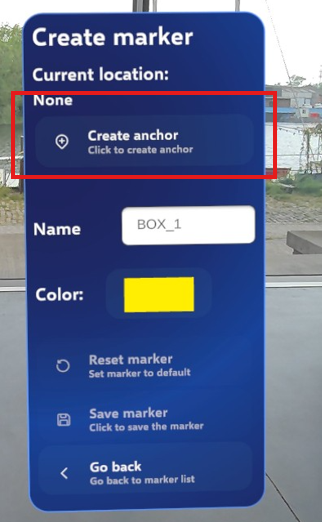
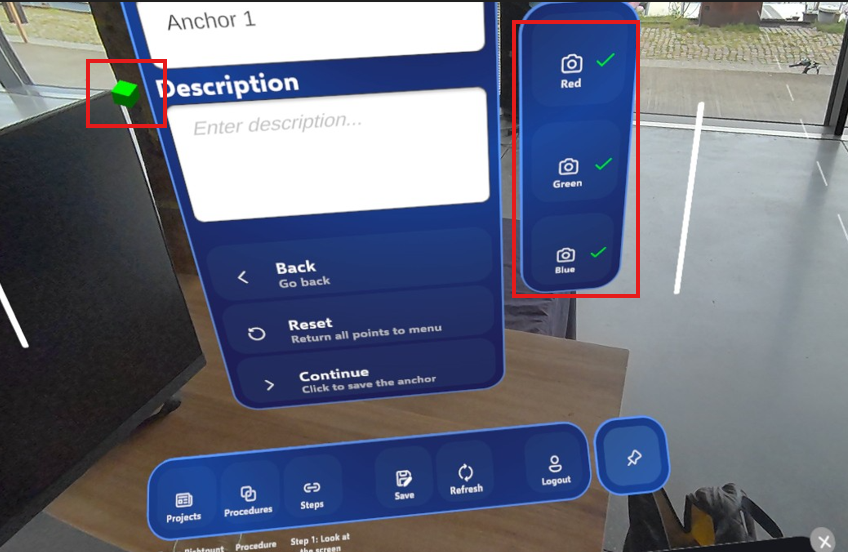
- For the Anchor we use 3-point-aligntment. This means you will have to define 3 points on your object to decide where the anchor will be.
-
Make sure to take a picture of all alignment points so you can easily place them when starting the XR Procdedure. Afterwards press Continue.
-
When the anchor is created, you can start with the markers. You can change the shape and color to better fit the training.
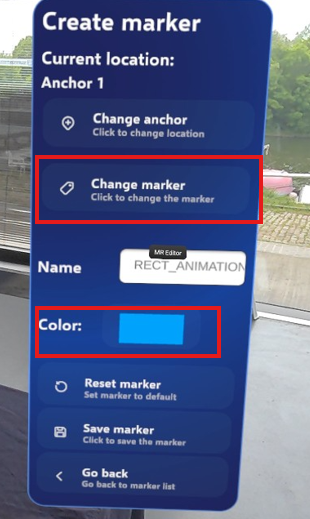

- Don't forget to finish your step and save your progress regularly!
Add annotations to the step
-
Annotations are notifications or labels you can add to a step for extra information.
-
Don't forget to save your progress regularly by using the 'Save' button in the navigation bar.
Publish and Preview your project and procedure in MR Editor
Publish the procedure
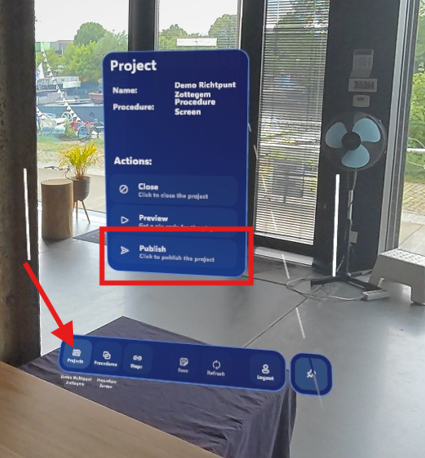
-
It's very important to publish your procedure regularly. When publishing, it will be saved on your devices but also on the XR Platform where you can continue working on the details of your XR Procedure.
-
Wait a few seconds for the project to be published. Depending on how much data you added, it could take a little longer.
-
When the process is done you'll see "Publish succeeded".
-
Don't forget to close the application when finished.
Preview the procedure
- Press Projects and Preview. You'll receive a pincode you can use in the Player app on your device.
Publish, Refresh and Preview your procedure on the XR Platform

-
When refreshing, all the changes between the platform and MR editor are synchronized.
-
You need to 'Publish' to share and schedule your project changes with the XR Platform and other members. After publishing, your changes will be visible to everyone.
-
If you want to see and test your procedure personally you can use the 'Preview' feature.
-
When you 'Publish' your procedure it is sent to a validator who will approve or reject your changes if this feature is active on your platform. When approved, your procedure can be scheduled as a job.
Preview on the XR Platform
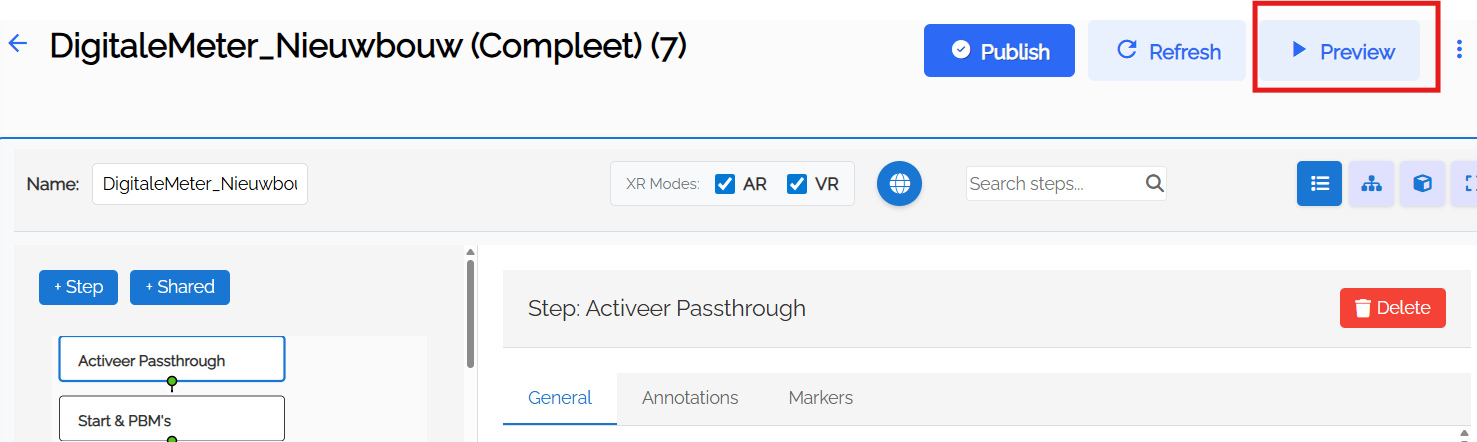

-
If you press 'Preview' you'll receive a pin code:
- Use the pin code in the Player app on Meta, Pico or other android device.
Publish on the XR Platform
- It's very important to publish your procedure regularly. When publishing, it will be saved online and can be accessed from the MR editor.

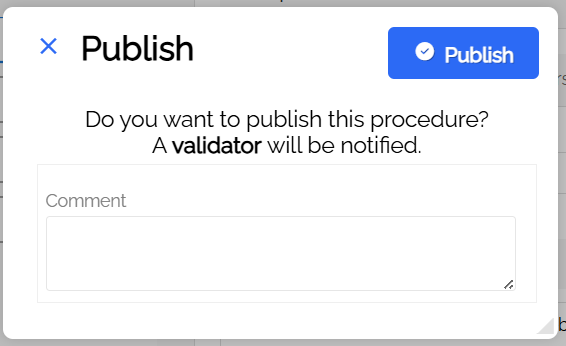
-
When publishing, give a brief description of the changes you made.
-
A validator will receive your request and has to approve it if this feature is active on your platform.
-
After this, designers or planners can schedule the procedure for other users as a job or in XR Instructor.